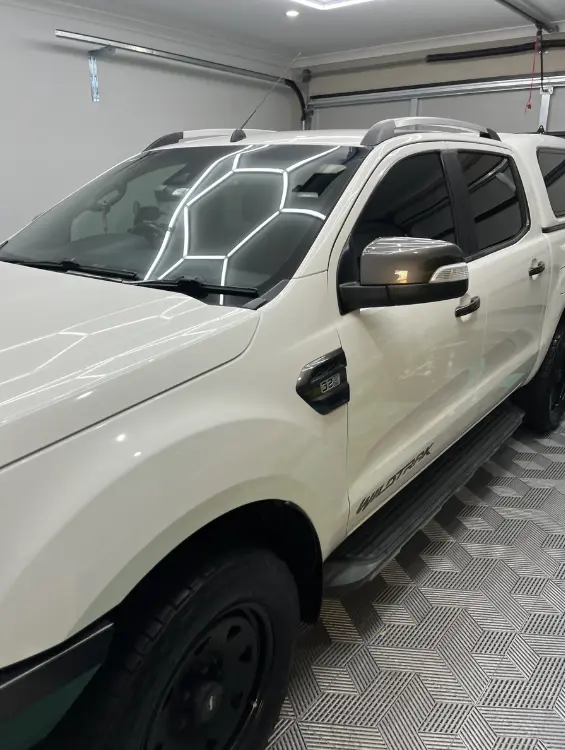
If you’ve ever thought about giving your car a fresh coat of paint, you’re in for a journey. Automotive paint repair can seem daunting, but with the right know-how, you can achieve a stunning finish. Whether you’re fixing a scratch or doing a full respray, understanding the basics and honing your skills will make all the difference. This guide shares practical tips tailored for Australian conditions, helping you navigate the ins and outs of automotive paint repair like a pro.

Key Takeaways

  • Surface prep is key; clean, sand, and prime for a solid base.
  • Choose your paint wisely—water-based options are eco-friendly and popular in Australia.
  • Thin coats are your friend; they help avoid runs and ensure a smooth finish.
  • Post-painting care is crucial; allow curing time and wash gently to maintain the look.
  • Safety first; always work in a well-ventilated area and wear protective gear.

Understanding The Basics Of Automotive Paint Repair

Alright, let’s get down to the nitty-gritty of car paint repair. We reckon it’s more than just slapping some colour on a panel. It’s about getting a finish that looks good and lasts, especially with the harsh Aussie sun beating down on it. So, before we even think about spray guns and clear coats, we need to understand the fundamentals.

The Importance Of Surface Preparation

Surface prep is where it all starts, mates. If you skip this, you’re basically building a house on sand. We’re talking about making sure the paint sticks properly, looks smooth, and doesn’t peel off after a few months. Think of it like this: you wouldn’t bake a cake in a dirty tin, would ya?

Here’s a quick rundown:

  • First, give the car a good wash with some degreaser. Get rid of all the muck and grime.
  • Next, sanding. This is where you get rid of the old paint and smooth out any imperfections. Start with rougher sandpaper and work your way up to finer stuff.
  • If there are any dents or scratches, use a body filler. Sand it back once it’s dry so it’s nice and flush.
  • Finally, primer. This gives the paint something to grip onto and helps prevent rust.

Choosing The Right Paint

Choosing the right paint is crucial. It’s not just about the colour, but also the type of paint. Different paints have different properties, and some are better suited to certain conditions than others. Plus, some are more environmentally friendly, which is always a good thing.

Consider these points:

  • Acrylic Lacquer: Dries fast, but not as durable.
  • Acrylic Enamel: More durable than lacquer, but takes longer to dry.
  • Two-Pack (2K): Super durable and gives a great finish, but you need to be careful with the fumes and use proper safety gear.

Don’t just grab the cheapest tin off the shelf. Do your research and pick a paint that’s right for your car and your budget. It’ll save you headaches down the road.

Essential Tools For The Job

Right tools, right job, right? You wouldn’t try to change a tyre with a butter knife, would you? Same goes for car paint repair. Here’s a few things we reckon you’ll need:

  • Sandpaper: Various grits, from rough to fine.
  • Spray Gun: A decent one will make a world of difference.
  • Masking Tape and Paper: To protect the areas you don’t want to paint.
  • Body Filler and Spreader: For filling in dents and scratches.
  • Primer: To help the paint stick.
  • Clear Coat: To protect the paint and give it a nice shine.
  • Safety Gear: Mask, gloves, and eye protection are a must!

Mastering Application Techniques

Alright, so we’ve prepped the surface, picked our paint, and got all the gear. Now comes the bit where we actually, you know, paint the thing. This is where things can go sideways real quick if we’re not careful. It’s all about technique, and trust us, practise makes perfect. We’ve all had our fair share of runs and orange peel, but with a bit of know-how, we can get a finish that’ll make you proud.

Spraying Tips For A Flawless Finish

Okay, listen up, because this is where the magic happens. The key to a good spray job is consistency. We’re talking about keeping that spray gun moving at a steady pace, about 15-20cm from the panel, and making sure each pass overlaps the last by about 50%. Think of it like mowing the lawn – you wouldn’t want to leave any stripes, would you?

Here’s a quick rundown:

  • Distance: Keep the gun the right distance from the surface. Too close, and you’ll get runs. Too far, and the paint will dry before it hits the panel, leaving a rough finish.
  • Overlap: Overlap each pass by about half to ensure even coverage. No gaps allowed!
  • Thin Coats: Multiple thin coats are way better than one thick one. Trust us on this. It prevents runs and gives a much better finish.

Common Mistakes To Avoid

We’ve all been there, staring at a freshly painted panel with a sinking feeling in our guts. Here are some common traps to avoid:

  • Runs and Sags: This usually happens when you apply too much paint in one go. Remember those thin coats we talked about?
  • Orange Peel: This is when the paint looks like the skin of an orange. It’s often caused by incorrect spray gun settings or not enough paint.
  • Dry Spray: This happens when the paint dries before it hits the surface, leaving a rough, textured finish. Usually caused by holding the gun too far away or not using enough thinner.

Don’t rush the job. Painting is a marathon, not a sprint. Take your time, be patient, and don’t be afraid to sand back any mistakes and start again. It’s all part of the learning process.

Adjusting Your Spray Gun Settings

Your spray gun is like a finely tuned instrument, and getting the settings right is crucial for a good finish. We need to adjust the fluid flow, air pressure, and fan width to suit the paint we’re using and the conditions we’re working in. Always check the paint manufacturer’s recommendations as a starting point.

Here’s a basic guide:

SettingEffect
Air PressureAffects the atomisation of the paint and the spray pattern.
Fluid ControlControls the amount of paint that comes out of the gun.
Fan WidthAdjusts the width of the spray pattern.

Professional Versus DIY Automotive Paint Repair

Evaluating Your Skill Level

Okay, so you’re thinking about saving some dosh and tackling that paint job yourself? Fair dinkum. But let’s be real for a sec. Have you ever actually used a spray gun before? Or are you more familiar with a brush and a tin of house paint? Professionals have years of experience and training, which means they’re less likely to make costly mistakes. We’re talking about achieving a showroom finish versus something that looks like it was attacked by a flock of seagulls. If you’re a complete novice, maybe start with something small, like painting your letterbox, before you commit to your entire car. Honesty is key here, mate.

Cost Considerations

Right, let’s talk money. On the surface, DIY looks cheaper, doesn’t it? You reckon you’ll just buy some paint and get cracking. But hold your horses. You’ll need more than just paint. Think about sandpaper, primer, masking tape, a decent spray gun (unless you fancy using a rattle can), and maybe even a compressor. And what about safety gear? A proper mask and gloves are essential. Suddenly, that ‘cheap’ DIY job isn’t looking so cheap anymore. A professional might seem more expensive upfront, but they’ve already got all the gear and the know-how to do the job properly. Plus, they can often get trade discounts on materials. Here’s a quick comparison:

ItemDIY Cost (Approx.)Professional Cost (Included)
Paint$150Included
Spray Gun$200Included
Sandpaper/Primer$50Included
Safety Gear$50Included
Total$450Varies

Time Investment

Time is money, as they say. And a DIY paint job can take a lot of time. We’re talking about hours of prep work, sanding, masking, spraying, and then waiting for the paint to dry. And that’s if everything goes smoothly. If you make a mistake, you’ll need to spend even more time fixing it. Professionals, on the other hand, can usually get the job done much faster. They’ve got the experience and the equipment to work efficiently. So, ask yourself, how much is your time worth? Are you happy to spend a whole weekend (or longer) painting your car, or would you rather pay someone else to do it while you kick back and relax?

Doing it yourself can be rewarding, but it’s not always the best option. Consider your skills, budget, and time constraints before making a decision. Sometimes, paying a professional is the smartest move in the long run.

Addressing Common Painting Challenges

Automotive paint repair tools and spray gun in action.

Even with the best prep work, things can still go wrong when you’re painting your car. Let’s look at some common problems and how to fix them.

Dealing With Orange Peel Effect

Orange peel, that bumpy texture that looks like, well, an orange peel, is a pain. It happens when the paint doesn’t level out properly. Usually, it’s down to the paint being too thick, the spray gun settings being off, or the air pressure being wrong.

  • Make sure you’re using the right thinners for your paint.
  • Adjust your spray gun to get a finer mist.
  • Check the air pressure at the gun – too low and the paint won’t atomise properly.

Preventing Runs And Sags

Runs and sags are those annoying drips that happen when you put too much paint on in one spot. It’s a pretty common mistake, especially for beginners. The key is to apply thin, even coats.

  • Don’t try to cover everything in one go.
  • Keep the spray gun moving at a steady pace.
  • Overlap your strokes slightly to avoid missed patches.

If you do get a run, don’t panic! Let it dry completely, then sand it down smooth and repaint the area. It’s a bit of extra work, but it’s better than leaving a big, ugly drip on your car.

Avoiding Fish Eyes

Fish eyes are those little craters that appear in the paint. They’re caused by contamination on the surface, like silicone or oil. Even a tiny bit of grease can ruin your finish.

  • Clean the surface really well with a wax and grease remover before you start painting.
  • Avoid touching the surface with your bare hands.
  • If you’re still getting fish eyes, you can try adding a fish eye eliminator to your paint.
ProblemCauseSolution
Orange PeelPaint too thick, wrong gun settingsThin paint, adjust gun, check air pressure
Runs/SagsToo much paint in one spotApply thin coats, keep gun moving
Fish EyesSurface contaminationClean surface thoroughly, use fish eye eliminator

Post-Painting Care And Maintenance

Glossy car paint finish after repair in Australia.

Curing Time Essentials

Alright, so you’ve just laid down some fresh paint. Awesome! But the job’s not quite done. Curing time is super important. Basically, it’s how long you need to wait before the paint is fully hardened and ready to face the world. Check the paint tin for the manufacturer’s recommendations – they know best. Don’t rush this step, or you might end up with a soft, easily damaged finish. We usually tell people to give it at least a week before doing anything too strenuous, like a proper wash or wax.

Regular Washing Techniques

Okay, so the paint’s cured. Now you gotta keep it clean! But not just any old wash will do. You need to be gentle. Here’s the drill:

  • Use a proper car wash soap – dish soap is a no-no, it’ll strip the wax.
  • Get yourself a soft microfibre wash mitt. Sponges can trap grit and scratch the paint.
  • Two-bucket method: one for soapy water, one for rinsing the mitt. This keeps the dirty water away from the car.
  • Wash in the shade, so the soap doesn’t dry too quickly.
  • Dry with a clean microfibre towel. Pat, don’t rub!

Washing your car regularly not only keeps it looking good, but it also removes contaminants that can damage the paint over time. Think bird droppings, tree sap, and road grime. Get into a routine, and your paint will thank you.

Waxing And Polishing Tips

Waxing and polishing are the secrets to a truly showroom-worthy finish. Waxing adds a layer of protection against the elements, while polishing removes minor imperfections and brings out the shine. Here’s the lowdown:

  • Waxing: Apply a thin, even coat of wax using a foam applicator. Let it haze over, then buff off with a clean microfibre towel. We reckon a good wax every few months is ideal.
  • Polishing: This is a bit more involved. You’ll need a polishing compound and a polishing machine (or a lot of elbow grease!). Start with a mild compound and work your way up if needed. Be careful not to burn through the paint!
  • Sealants: Consider using a paint sealant instead of wax. Sealants tend to last longer and offer better protection, especially in the harsh Aussie sun.
Product TypeFrequencyBenefits
WaxQuarterlyAdds shine, protects against UV rays
PolishAnnuallyRemoves scratches, enhances paint clarity
SealantBi-AnnuallyLong-lasting protection, water beading

Safety And Environmental Considerations

Auto painting can be risky if you don’t take the right precautions. We’re talking about chemicals, fumes, and waste that can be harmful to you and the environment. It’s not just about getting a good-looking paint job; it’s about doing it safely and responsibly. Let’s run through some things we need to keep in mind.

Ventilation Requirements

Good ventilation is absolutely critical when you’re spraying a car. You need to make sure you’ve got a decent airflow to get rid of those paint fumes. If you’re working in a garage, open the doors and windows. Even better, use exhaust fans to pull the fumes out. If you’re doing this regularly, think about investing in a spray booth. It’s a dedicated space designed to keep you safe and the air clean. Trust me, your lungs will thank you.

Protective Gear Recommendations

Okay, gear time. This isn’t optional; it’s essential. We’re talking about:

  • A proper respirator mask with the right philtres. Don’t skimp on this; your health is worth more than saving a few bucks.
  • Gloves. Protect your skin from the chemicals in the paint and solvents.
  • Safety goggles. You don’t want paint or chemicals splashing in your eyes.
  • Overalls or a painting suit. Keep the paint off your clothes and skin.

Basically, cover up as much as possible. It’s better to be safe than sorry. We don’t want any nasty chemicals absorbing into our skin.

Proper Waste Disposal Practises

What goes up must come down, and what you spray has to go somewhere. Don’t just chuck your leftover paint, solvents, and rags in the bin. That’s a big no-no. Check your local council’s guidelines for disposing of hazardous waste. Usually, there are specific collection points or services you can use. Also, think about using reusable containers and minimising waste wherever possible. Every little bit helps, right?

Finishing Touches For A Professional Look

Alright, so you’ve laid down the paint, and it’s looking pretty good. But we’re not done yet, mate! It’s the finishing touches that really separate a good job from a fantastic one. Let’s run through what we need to do to get that showroom shine.

Techniques For A Polished Finish

Okay, so the paint’s dry, but is it perfect? Probably not. There’s likely some orange peel or other minor imperfections. This is where we get serious with the fine-grit sandpaper. We’re talking 2000 grit or higher. Wet sanding is your best bet here. Keep the surface wet, and gently sand down any imperfections. The goal isn’t to remove all the paint, just to smooth out the surface. Once you’re happy with the sanding, it’s time to get the polishing compound out. Use a polishing pad on a buffer, and work the compound into the paint. This will bring out the shine and remove any swirl marks from the sanding. You might need to do a couple of passes with different compounds to get the finish you’re after. Remember to take your time and don’t apply too much pressure.

Extending The Lifespan Of Your Paint Job

So, you’ve got a killer paint job, now how do you keep it that way? Well, it’s all about maintenance. Regular washing is key. Use a good quality car wash soap and a soft sponge or wash mitt. Avoid harsh chemicals or abrasive cleaners. Waxing is also important. A good wax will protect the paint from the elements and keep it looking shiny. Apply wax every few months, or as needed. If you notice any chips or scratches, touch them up as soon as possible. This will prevent rust and further damage.

Think of your car’s paint like your own skin. You wouldn’t go out in the sun without sunscreen, would you? Same goes for your car. Protect it from the elements, and it’ll stay looking good for years to come.

Here’s a quick guide to washing:

  • Rinse the car thoroughly with water.
  • Wash the car with soap and water, using a soft sponge or wash mitt.
  • Rinse the car again with water.
  • Dry the car with a clean towel.

Final Inspection Tips

Before you call it a day, take a good hard look at your work. Park the car in direct sunlight and look for any imperfections you might have missed. Check for swirl marks, orange peel, or any other blemishes. If you find anything, go back and fix it. It’s better to spend a little extra time now than to be unhappy with the results later. Also, make sure all the trim and other parts are properly reinstalled. You don’t want to be driving down the road and have something fall off. Finally, stand back and admire your work. You’ve earned it!

To give your car that polished, professional look, don’t forget the final details. Simple touches like cleaning the windows, shining the wheels, and applying a protective wax can make a big difference. These finishing touches not only enhance the appearance of your vehicle but also help protect it from the elements. Ready to elevate your car’s look? Visit our website for more tips and to book your detailing service today!

Wrapping It Up

So there you have it! Getting that perfect paint job on your car isn’t just about slapping on some colour and calling it a day. It takes a bit of know-how, some decent tools, and a fair bit of patience. Whether you’re thinking of doing it yourself or calling in the pros, just remember to prep well, choose the right materials, and take your time. If you’re ever in doubt, don’t hesitate to reach out to a local expert. They can help you get the results you want, especially with the unique Aussie conditions in mind. Happy painting!

Frequently Asked Questions

What is the most important step in auto paint repair?

The most important step is surface preparation. If you don’t clean and prepare the surface well, the paint won’t stick properly.

How do I choose the right paint for my car?

You should consider the type of paint based on durability and environmental impact. Water-based paints are popular in Australia for being eco-friendly.

What tools do I need for DIY auto paint repair?

You will need a spray gun, air compressor, safety gear, and a clean workspace to ensure a good paint job.

How can I avoid common painting mistakes?

Practise your spraying technique and make sure to keep the spray gun at the right distance from the surface to avoid runs and uneven coverage.

What should I do after painting my car?

After painting, let the paint cure fully, wash it gently, and apply wax to protect the finish.

What safety precautions should I take while painting?

Always work in a well-ventilated area, wear protective gear like gloves and masks, and dispose of paint waste properly.

Leave a Reply

Your email address will not be published. Required fields are marked *